UI Builder is a new toolkit for creating user interfaces in Unity. It’s a step away from the canvas/game object paradigm that Unity has embraced for quite some time. This new framework is closer to building UIs on the web in that content is separated from the styling (html + css).
I’ve been developing in Unity for quite some time now and the Toolkit is a refreshing change. I enjoy the more structured approach to building layouts in UXML and styling with USS.
Should I Use UI Builder to Make my Game’s UI?
While the framework is still in development, Unity has stated that it plans for it to become the recommended way to build UIs. UI Toolkit is planned to become production-ready in version 2020.1 (source).
Now may be a good time to get a head start on learning this new tech.
What is UI Builder / UI Toolkit? Is there a difference?
UI Builder is a new authoring tool in Unity that lets you visually create UXML files. This UXML is used to make editor UI as well as runtime game UI.
The UI Toolkit is a set of features that let’s you author UIs for your game. Specifically it includes the C# Visual Element API, the UXML and USS assets, UI and Event Debuggers, and the UI Builder (source).
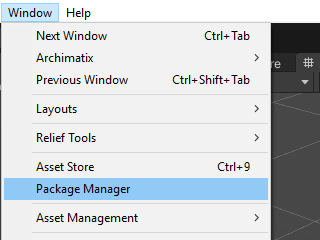
Installing the UI Builder Package
Your unity editor will need to be at least 2020.1.
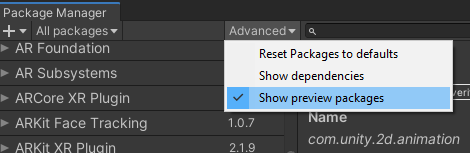
Go to the Package Manager and search for:
You may need to enable ‘Show preview packages’ setting to see the package.
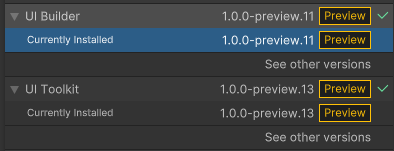
If you are only building Editor UIs, you will need UI Builder. If you want to make runtime game UIs, you will need UI Toolkit (which actually includes the UI Builder package). There is no harm in installing both if you’re not sure what you need yet.
Getting Started with UI Builder
Now that you have access to the toolkit, now you can create something!
Here’s a presentation from Unite Copenhagen 2019 demonstrating UI Builder:
We’re going to create a script that, when given a collection of URLs, will download the files at those URLs in parallel.
This is great for downloading non-Unity specific files like JSONs. If you want to download, say, a game object or scene you would need to look into Asset Bundles. This article doesn’t cover Asset Bundles as that is an entire topic of its own.
Let’s start with the entry point of this class, the Download method.
We’re simply taking accepting a collection of URLs (this can be a list for example) as well as a path to where we’d like to save the downloads. This path is relative to Application.persistentDataPath (this location is different based on your platform).
    [SerializeField]
    private int maxConcurrentDownloads = 3;

    private Queue<string> urlsToDownload = null;

    public void Download(IEnumerable fileURLs, string pathToStore)
    {
        urlsToDownload = new Queue<string>();

        foreach (string url in fileURLs)
            urlsToDownload.Enqueue(url);

        StartCoroutine(DownloadFiles(pathToStore));
    }

    public void Download(IEnumerable fileURLs, string pathToStore)
    {
        urlsToDownload = new Queue<string>();

        foreach (string url in fileURLs)
            urlsToDownload.Enqueue(url);

        StartCoroutine(DownloadFiles(pathToStore));
    }
The Download Files coroutine is where we do the heavy lifting. We simply create a bunch of Unity Web Requests (based on the collection of URLs we were given) at once. We can control the number of concurrent downloads by setting maxConcurrentDownloads.
    private IEnumerator DownloadFiles(string pathToStore)
    {
        var requests = new List<UnityWebRequestAsyncOperation>();

        int requestsSent = 0;

        //Start all requests
        while (requestsSent < maxConcurrentDownloads)
        {
            if (urlsToDownload.Count == 0)
                break;

            var www = UnityWebRequest.Get(urlsToDownload.Dequeue());
            requests.Add(www.SendWebRequest());

            requestsSent++;
        }

        //Wait for all requests
        yield return new WaitUntil(() => AllRequestsDone(requests));

        //Process results
        HandleAllRequestsWhenFinished(requests, pathToStore);

    }
Once the requests are all sent, we WaitUntil (aptly named) the requests are done. We yield here as we’d like to make sure that the download has actually finished.
Once downloaded, we handle the requests. We simply loop through the requests and throw any out that have an error (detected via RequestHasError).
WriteToDisk takes the request and writes the bytes inside of it into the pathToStore directory we specified at the very beginning.
In the All Requests Done method we are using LINQ to utilize the ‘All’ syntax. It’s very neat!
In a real setting I would write an interface to expose the Download() method to the rest of the game. For sake of simplicity I will reference the concrete MultiFileDownloader class.
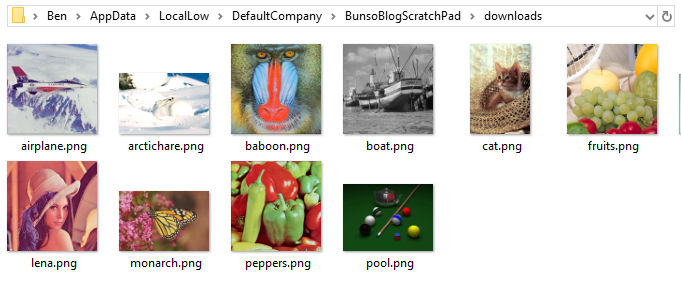
This example downloads images from a college programming course’s website (I am not affiliated with them but it was the first link when I googled ‘downloadable sample images’).
I am simply taking a base URL and concatenating it with a list of file names. I then pass this list of URLs to the multi file downloader service.
using System.Collections.Generic;
using UnityEngine;
public class DownloadFilesExample : MonoBehaviour
{
[SerializeField]
private MultiFileDownloader downloader;
[Tooltip("Application.persistentDataPath/storagePath")]
[SerializeField]
private string storagePath = "downloads";
[SerializeField]
private string baseImageUrl = "https://homepages.cae.wisc.edu/~ece533/images/";
[SerializeField]
private List fileNames = new List { "airplane.png",
"arctichare.png",
"baboon.png",
"boat.png",
"cat.png",
"fruits.png",
"girl.png",
"goldhill.png",
"lena.png",
"monarch.png",
"peppers.png",
"pool.png" };
void Start()
{
StartDownload();
}
public void StartDownload()
{
var files = PrepareUrls();
downloader.Download(files, storagePath);
}
private List PrepareUrls()
{
var urls = new List();
foreach (var name in fileNames)
urls.Add(baseImageUrl + name);
return urls;
}
}
On Windows the files will be written to <UserName>/AppData/LocalLow/<Company>/<ProjectName>/downloads
Grab the Entire Script
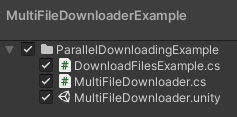
You can also download an example project that includes the downloader as well as the usage example at the end.
Here’s the entire Multi File Downloader script:
using System.Collections;
using System.Collections.Generic;
using System.IO;
using System.Linq;
using UnityEngine;
using UnityEngine.Networking;
public class MultiFileDownloader : MonoBehaviour
{
[SerializeField]
private int maxConcurrentDownloads = 3;
private Queue<string> urlsToDownload = null;
public void Download(IEnumerable fileURLs, string pathToStore)
{
urlsToDownload = new Queue<string>();
foreach (string url in fileURLs)
urlsToDownload.Enqueue(url);
StartCoroutine(DownloadFiles(pathToStore));
}
private IEnumerator DownloadFiles(string pathToStore)
{
var requests = new List<UnityWebRequestAsyncOperation>();
int requestsSent = 0;
//Start all requests
while (requestsSent < maxConcurrentDownloads)
{
if (urlsToDownload.Count == 0)
break;
var www = UnityWebRequest.Get(urlsToDownload.Dequeue());
requests.Add(www.SendWebRequest());
requestsSent++;
}
//Wait for all requests
yield return new WaitUntil(() => AllRequestsDone(requests));
//Process results
HandleAllRequestsWhenFinished(requests, pathToStore);
}
    private bool AllRequestsDone(List<UnityWebRequestAsyncOperation> requests)
    {
        return requests.All(r => r.isDone);
    }
private void HandleAllRequestsWhenFinished(List<UnityWebRequestAsyncOperation> requests, string pathToStore)
{
foreach (var request in requests)
{
if (RequestHasError(request))
continue; //Toss failed downloads
WriteToDisk(request, pathToStore);
}
//Get more downloads
if (urlsToDownload.Count > 0)
StartCoroutine(DownloadFiles(pathToStore));
}
private bool RequestHasError(UnityWebRequestAsyncOperation request)
{
var error = request.webRequest.error;
if (string.IsNullOrEmpty(error))
return false;
else
{
Debug.LogWarning(request.webRequest.url + " | " + error);
return true;
}
}
private void WriteToDisk(UnityWebRequestAsyncOperation request, string pathToStore)
{
var bytes = request.webRequest.downloadHandler.data;
if (bytes != null)
{
var baseStorePath = CreateDirectory(pathToStore);
var fileName = Path.GetFileName(request.webRequest.url);
var dataPath = baseStorePath + "/" + fileName;
File.WriteAllBytes(dataPath, bytes);
Debug.Log("Downloaded Successful | Saved to: " + dataPath);
}
}
private string CreateDirectory(string pathToStore)
{
var baseStorePath = Application.persistentDataPath + "/" + pathToStore;
Directory.CreateDirectory(baseStorePath);
return baseStorePath;
}
}
Download an Example Project
I’ve provided a Unity package with both a demo scene and the downloader scripts. Feel free to build from it.
The Asset Store is awesome! There’s a huge offering in the asset store and it can be difficult to settle on one tool to get the job done.
You’ve got to get good at picking out what you really need or else you risk overspending.
Here are a couple questions I ask myself when I’m looking for an asset.
When Was it Last Updated?
The more recently it’s been updated the better.
I’m always a little worried when I pull in an asset that hasn’t been touched since 2010. Unless, of course, the reviews say it’s fine.
Unity is updated frequently. New functionality is added and some features can even become completely obsolete. You want to save yourself the trouble of having to comb through an old asset/script and replacing nonexistent function calls with the contemporary equivalent (if it even exists anymore.. Yeah I’ve been there.)
Is there a community around this plugin?
In an ideal world the asset you download just works. I love when that happens.
In the real world you’re probably going to run into some obstacles. Every use case is a little different and the value of a having a community you can ask questions to is immense.
Bonus points for a support Discord, or similar setup. Being able to reach out to a supportive developer is invaluable.
Supported target platforms?
Make doubly sure that the thing you’re vetting will actually work on the platform you’re building for.
The largest offenders: WebGL + mobile
Roadmap? A plan for future support?
I value assets and their developers that have a plan.
Review Red Flags
While I get that not all reviews were written with the same intent/context, I do believe that where there’s smoke there’s a fire. In the same breath don’t let one bad review scare you, rather, pay attention to patterns.
I’d stay away from plugins with reviews with any of the following characteristics:
A non-responsive developer
Worse: a combative developer
Performance issues
Bugs, bugs, bugs (especially when you’re paying for an asset)
Bloated
Where’s the documentation?
Closing Thoughts
Running through these questions has saved me a lot of headaches.
Let me know what you look for in determining if an asset is good – I’m all ears.
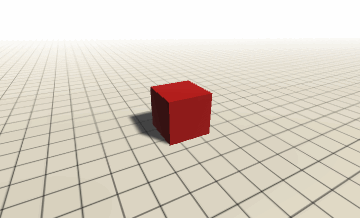
The use case I had in mind with this script is a player inventory in which an item can be viewed ‘up close’. The player would bring this view up and the camera will rotate around the item automatically at a set speed.
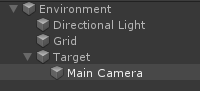
We are going to setup a scene where we have a ‘stage’ with a model, our item, sitting on it. We’d like the camera to rotate while facing this model the entire time.
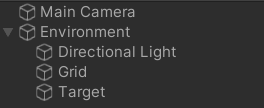
Main Camera and Target are the important objects. I just added a plane (Grid) to help ‘ground’ the target.
My target is just a cube.
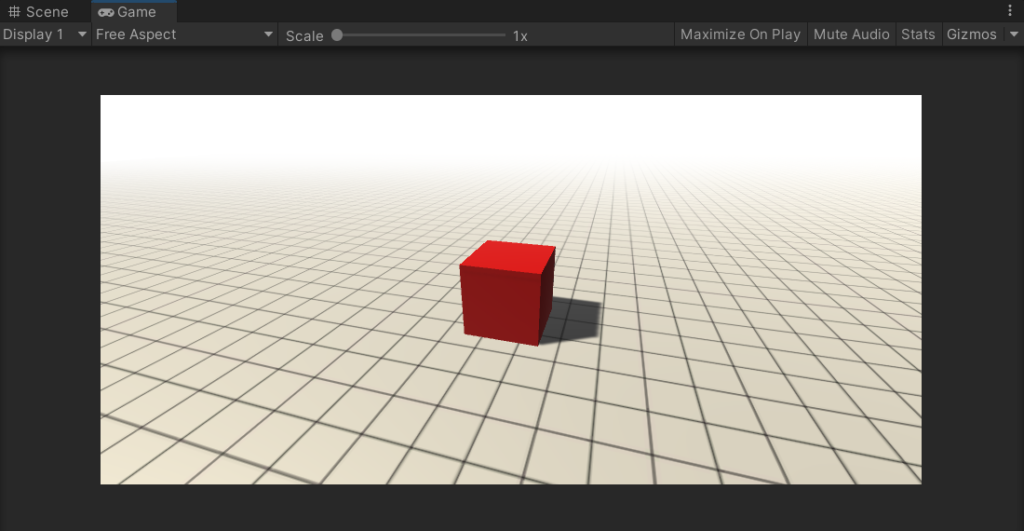
I moved my camera so that it’s just above the target cube. This will allow us to get a view of the cube from the top as it rotates around. The starting position of the camera is up to you.
The Rotating Camera Script
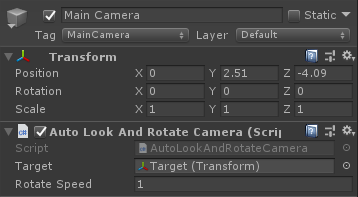
You need a reference to the target’s transform component.
Transform.LookAt(target) is doing a lot of the heavy lifting here. This will adjust the rotation of the camera (or whatever object you attach this component to) to face the target object.
Transform.Translate(Vector3.right * Time.deltaTime * rotateSpeed) will affects the camera’s position and will cause it to rotate around a center point.
using UnityEngine;
public class AutoLookAndRotateCamera : MonoBehaviour
{
        [SerializeField]
        private Transform target;

        [SerializeField]
        private float rotateSpeed = 1f;

        void Update()
        {
            transform.LookAt(target);
            transform.Translate(Vector3.right * Time.deltaTime * rotateSpeed);
        }
}
Now attach the AutoLookAndRotateCamera to the camera in your scene. This component requires a target so drag in a reference to what you’d like to look at (the cube in this case).
That’s it!
Want the Camera to Follow the Target?
Say your target doesn’t stay in place. This script simply looks at the target and moves the camera along it’s right axis. We need the camera to follow the target.
The easiest way to do this is by parenting the camera to the target. Like this:
Doing it this way will cause the camera stay at a fixed distance away from the target. Now if the target moves, the camera moves along with it all the while rotating in a circle around the target.
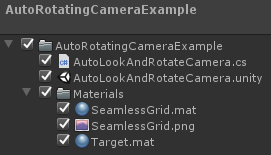
Download the Example Project
I’ve provided a Unity package with both the scene and the camera script. Feel free to build from it.